UP2 Board
The UP Squared board (UP2) is an x86 maker board based on Intel platform Apollo Lake. The UP boards are used in IoT, industrial automation, digital signage areas etc.
Prerequisites
SBL supports UP2 maker board. To start developing SBL, the following equipment, software and environments are required:
UP2 kit (Model N3350)
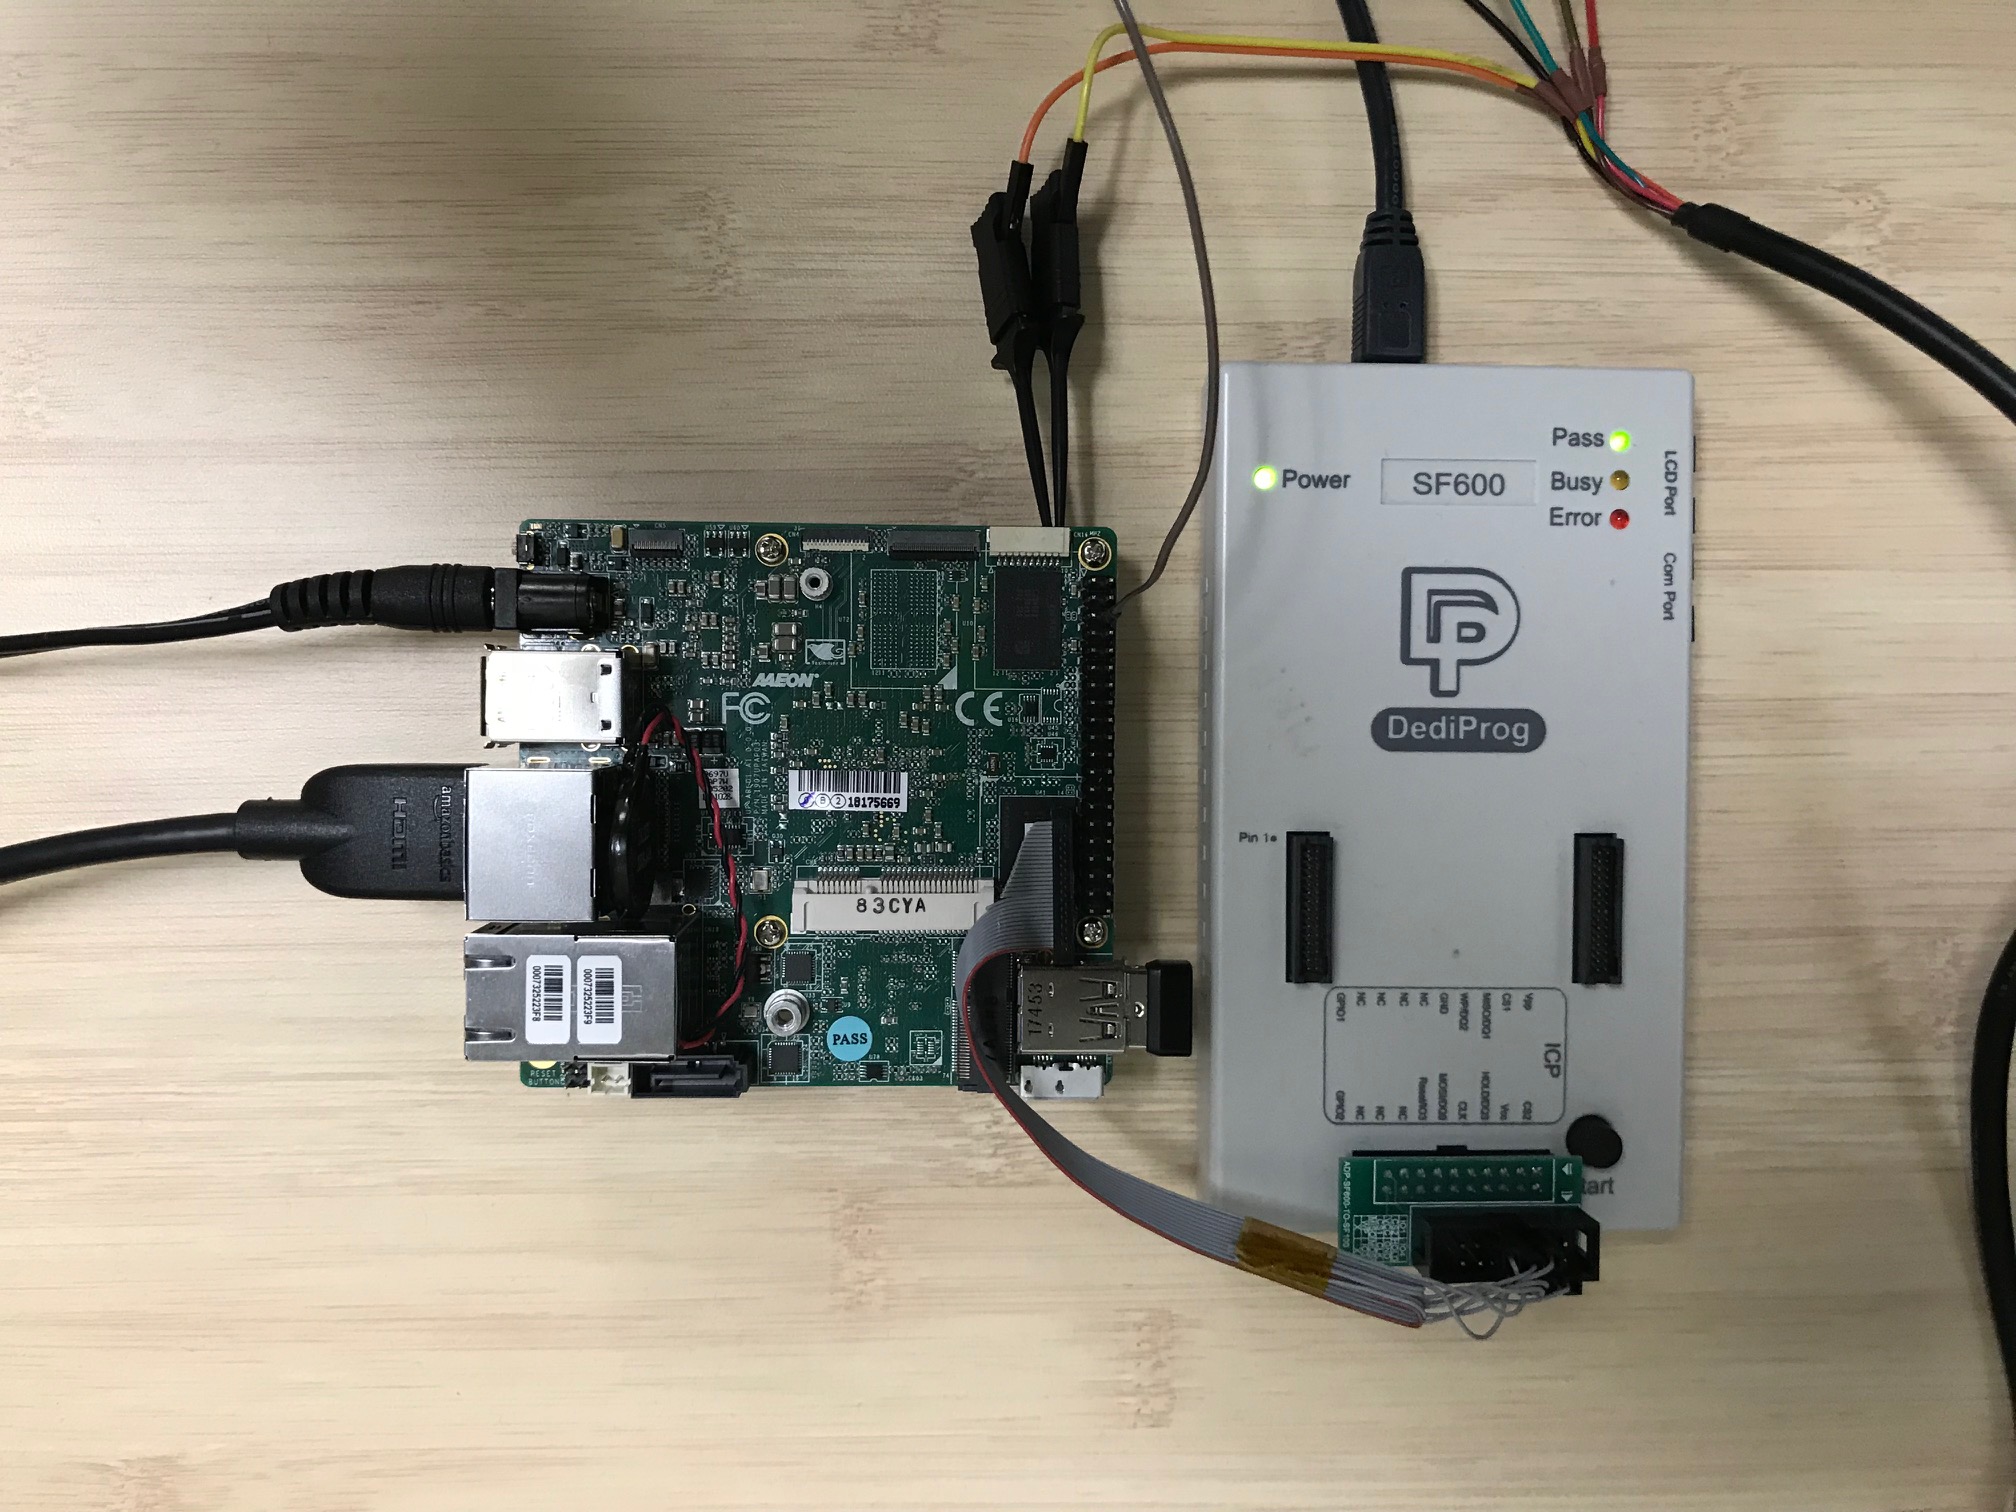
Custom SPI flashing cable (instructions).
USB 2.0 pin header cable for debug uart output. OR Make your own.
DediProg SF100 or SF600 programmer
Linux host (see Building on Linux for details)
Internet access
Board Setup
Before You Start
Warning
As you plan to reprogram the SPI flash, it’s a good idea to backup the pre-installed BIOS image first.
Boot the board and enter BIOS setup menu to get familiar with the board features and settings.
UP2 is pre-installed with Ubuntu Linux. Boot to Ubuntu and confirm the display, USB, network and other peripherals are working.
Early boot serial debug console can be reached via UART0 located on CN16 header on the UP2 board. Make sure you can observe serial output message running the factory BIOS first.
Note
To make your own UART debug adapter by wiring, refer to CN16 Header Pinout for UART0:
Pin |
Signal |
8 |
GND |
9 |
UART_RX |
10 |
UART_TX |
In order to boot Ubuntu from eMMC using SBL, it is required to copy the kernel image to the boot partition (FAT32 partition) on the eMMC.
Alternatively, you can boot Yocto OS from USB key without any changes.
You may use utilities (e.g. Rufus) to create a bootable USB key from the Yocto OS image downloaded.
Building
UP2 board is based on Intel Apollo Lake platform. To build:
python BuildLoader.py build apl
The output images are generated under Outputs directory.
Stitching
Stitch SBL images with factory BIOS image using the stitch tool:
python Platform/ApollolakeBoardPkg/Script/StitchLoader.py -i <BIOS_IMAGE_NAME> -s Outputs/apl/Stitch_Components.zip -o <SBL_IFWI_IMAGE_NAME> -p 0xAA00000E

<BIOS_IMAGE>     : Input file. Factory BIOS extracted from UP Squared board.
<SBL_IFWI_IMAGE> : Output file. New IFWI image with SBL in BIOS region.
-p <value>       : 4-byte platform data for platform ID and debug UART port index.
Note
StitchLoader.py script works only if Boot Guard in the base image is not enabled, and the silicon is not fused with Boot Guard enabled. If Boot Guard is enabled, please use StitchIfwi.py script instead.
See Stitch Tool on how to stitch the IFWI image with SBL.
Slimbootloader binary for capsule
Creating Slimbootloader binary for capsule image requires the following steps:
Build SBL for UP2:
python BuildLoader.py build apl
Run stitching process as described above to create a SBL IFWI binary sbl_up2_ifwi.bin:
python Platform/ApollolakeBoardPkg/Script/StitchLoader.py -i <BIOS_IMAGE_NAME> -s Outputs/apl/Stitch_Components.zip -o sbl_up2_ifwi.bin -p 0xAA00000E
Extract bios.bin from SBL IFWI image:
python BootloaderCorePkg/Tools/IfwiUtility.py extract -i sbl_up2_ifwi.bin -p IFWI/BIOS -o bios.bin
Generate capsule update image FwuImage.bin:
python BootloaderCorePkg/Tools/GenCapsuleFirmware.py -p BIOS bios.bin -k KEY_ID_FIRMWAREUPDATE_RSA2048 -o FwuImage.bin
Triggering Firmware Update
Sample implementation of trigerring firmware update is explained below
SBL for UP2 uses BIT16 of PMC I/O register (Scratchpad for sharing data between BIOS and PMC Firmware (BIOS_SCRATCHPAD) - Offset 1090h) to trigger firmware update. When BIT16 is set, SBL will set the boot mode to FLASH_UPDATE.
please refer to IsFirmwareUpdate() function called in Platform\ApollolakeBoardPkg\Library\Stage1BBoardInitLib\Stage1BBoardInitLib.c to understand how SBL will detect firmware update mode.
Flashing
Flash the IFWI image to UP2 board using a SPI programmer. See instructions.
Booting Yocto Linux from USB
You may need to change boot options to boot from USB. See Change Boot Options.
Download Apollo Lake platform Yocto Linux.
Create bootable USB key. For example: In Windows, Rufus can be used. In Linux, etcher app can be used.
Boot the bootable OS image from USB key on the board.
Booting Pre-installed Ubuntu from eMMC
Booting Ubuntu from SBL requires a few extra steps because SBL default payload (OsLoader) loads kernel directly from boot partition, compared to UEFI BIOS which relies on GRUB 2 to boot Ubuntu.
Boot to Yocto Linux from USB. See Booting Yocto Linux from USB for more details.
Copy vmlinuz and initrd file to
/media/mmcblk0p1directory
sudo cp /media/mmcblk0p2/boot/vmlinuz-4.10.0-9-upboard /media/mmcblk0p1/vmlinuz
sudo cp /media/mmcblk0p2/boot/initrd.img-4.10.0-9-upboard /media/mmcblk0p1/initrd
Create
config.cfgfile containing the following kernel command line and save it/media/mmcblk0p1directory
BOOT_IMAGE=/boot/vmlinuz-4.10.0-9-upboard root=/dev/mmcblk0p2 earlycon=uart8250,mmio32,0x82531000,115200n8 <eof>
Good Luck!